CALL: (02) 6655 4069
This page can also be read as a pdf. Download (876kB) here: Our processes – ecoliving design
There are many different types of work we do and the design process is never the same for two different projects. People and sites are always different and the work is made to suit. You may only need a few hours consultation, or a quick landscape mud map. This article refers to a complex project like a new house design.
We’ll informally discuss the project, talking through what you need and want. I’ll also try to get an idea of the scope of work. This can be complex because we’re multidisciplinary and customise the service and degree of detail to you. Sometimes the conversation meanders into solutions but generally this is the place to define the problems, not solve them.
The meeting is generally informal and without charge. However, sometimes (in contradiction to the first paragraph) it can develop into a pretty solid design session lasting hours. In this case I’ll record some of that time and if you end up going with us, the time is charged.
You will receive a fee proposal. It will show what you get, and don’t get. We charge an hourly rate of $80 until a fee cap is reached, after which there is no further charge. The fee cap is voided if you approve a stage of work and later request major redesign. We may charge progress payments.
We’ll make every attempt to do the best possible job in the least amount of time. You may be able to reduce the design time by thinking thoroughly through the design issues and arriving at more resolved directions. This may extend the calendar time spent on the process.
It may be tempting to reduce the design fee by arriving at premature solutions. You have to live with and pay for the solutions so it’s a good investment putting enough hours in to the design to get it right.
If you agree to and sign the fee proposal we start.
We’ll develop a brief. The brief is a short description of what you want from the house, considering factors such as who lives there now and in future, how they will live, what you like, environmental outcomes, budget, site and constraints. The brief is only a short document but essential to get right. It may require extensive discussion between all parties, reflection and time.
The brief checks right at the start that we understand what you want. It helps during the design process to check that we don’t wander off course. It’s OK to change the brief later on, as long as it’s controlled and deliberate.
In the open or between the lines we’ll try to understand your dream.
Often some questions will come up that you can’t answer immediately. That’s OK, and normal. You might have to go away, talk, think and get back to us. People inexperienced in the exercise of building a house often have difficulty articulating what they want or prioritising different needs & wants. Lucky for you, we’re here to help!
Try to separate ideas from solutions. “I want to capture the views” is an idea. “I want a wall of glass on that side” is a solution. It might not necessarily be the best solution – that’s what we work on. An exception to this rule is that if you have come across a solution that you think would work really well for you, by all means document it with a photo, sketch or measurements. Speaking of measurements – during the design process if you see a room somewhere that looks just the right size for you, measure it up!
Don’t be surprised if we spend quite a bit of time talking about what you want. It might seem unproductive sitting around talking instead of getting stuck into drawings. From experience the most productive method is to invest time first up in getting clear ideas, and to progress through the design phase with clarity and no major back tracking. It’s also good economy because I’m careful not to build any more than you need.
During the design process we’ll be communicating quite a bit. I find that routine things can be done by email and that conversation requiring sequences of feedback works better face to face. Otherwise, the next best compromise is by phone ideally over a land line.
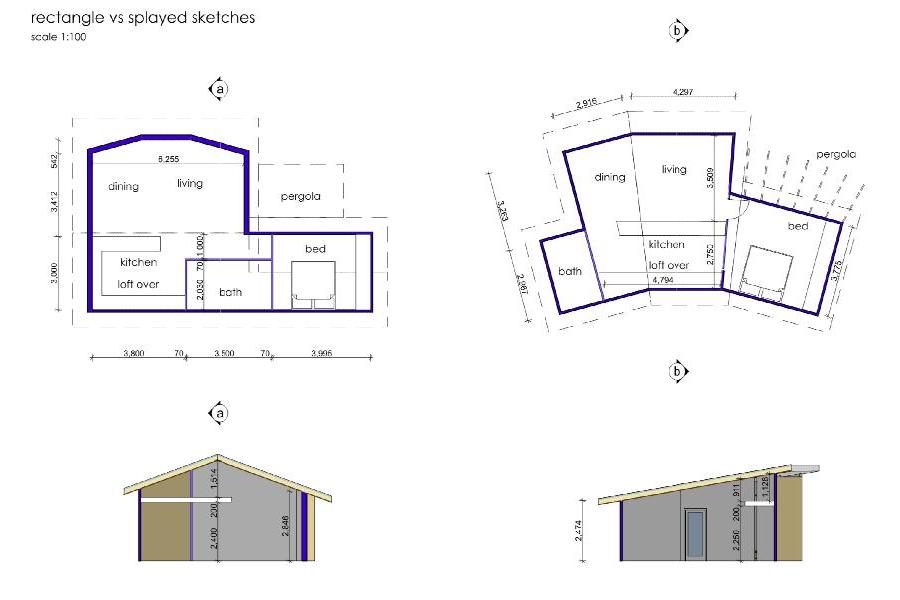
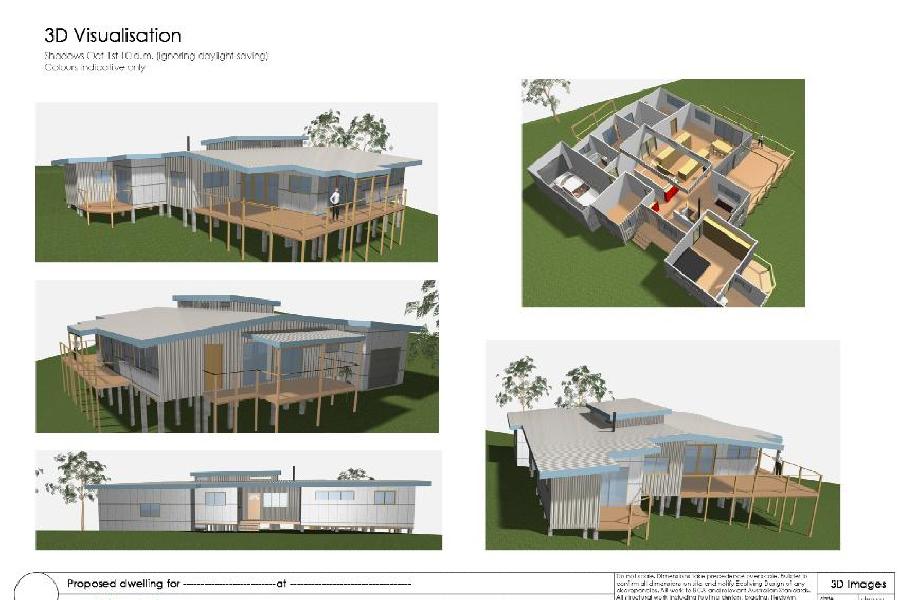
This is the starting point for changing written ideas into drawings. Sketches are a creative process where we don’t attempt to get everything perfect, rather we throw ideas around and listen to the feedback. The sketches may be computer drawn (CAD). The colour 3D format makes for easy visualisation, easy design in 3D and it can be a quick process.
A disadvantage of using CAD at this stage is that some people get confused because the drawings look sort of final but there are obvious missing bits. For example, the sketch below left has no doors or windows. Try to understand that at this stage they are just quick, incomplete drawings that are there to be scribbled on.
In some cases input from a consultant such as engineer, on site waste water management, bush fire consultant etc. may be taken now.
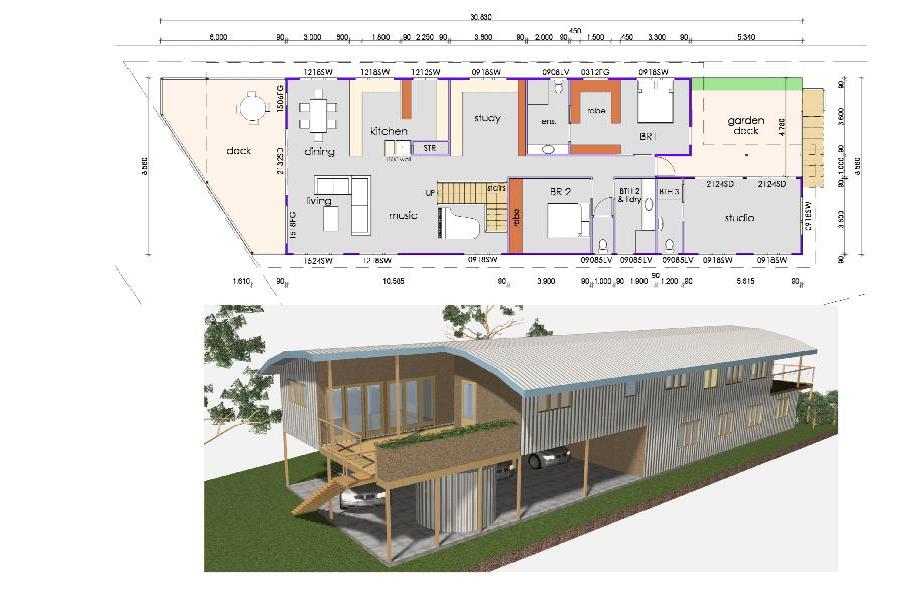
With each cycle of sketch drawing/ feedback the concept gets closer to the mark and progressively more detailed. You can reduce the cost of extra cycles by thorough consultation with us and giving yourself time to think through the revisions.
As the design gets better resolved we might further consult on some of the detail. Depending on the job, it could be product manufacturers, thermal modelling, structural engineering. When we have meaningful resolution it’s worth getting some costing input by a builder. If I compare two options I can reliably pick which is more expensive. However I can’t accurately predict a dollar figure for costing. Although some builders offer this service for free in exchange for a better chance of getting the job, they may be more motivated to do the exercise accurately if they’re paid for their time.
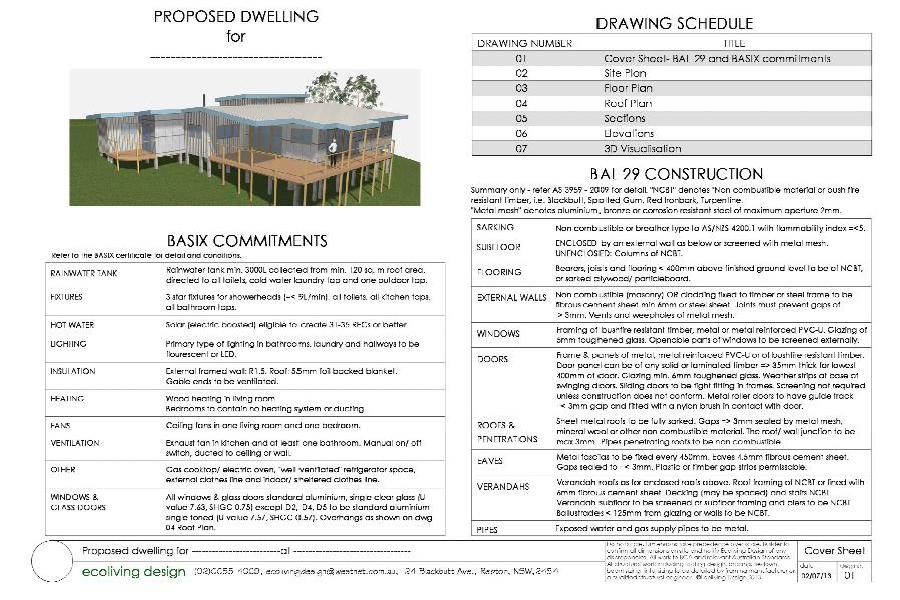
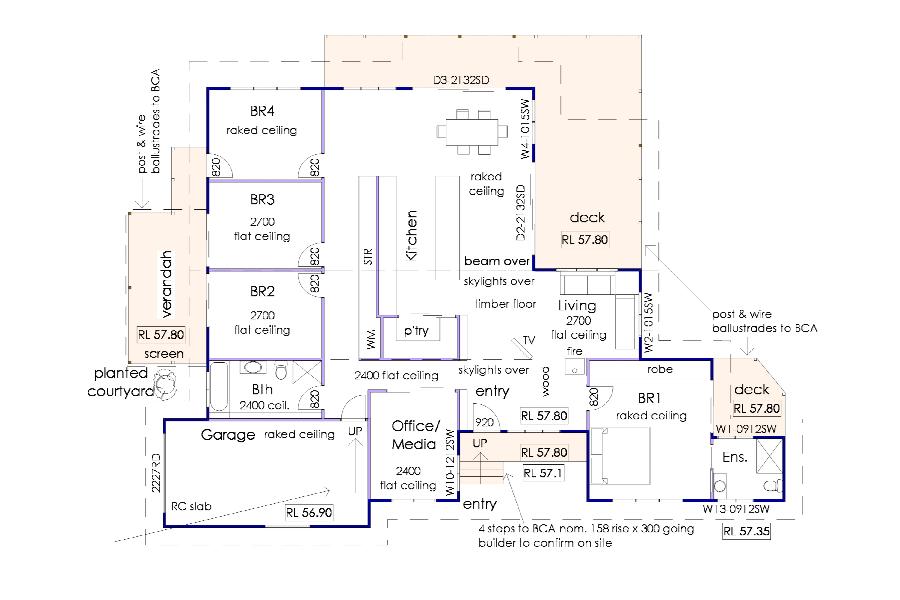
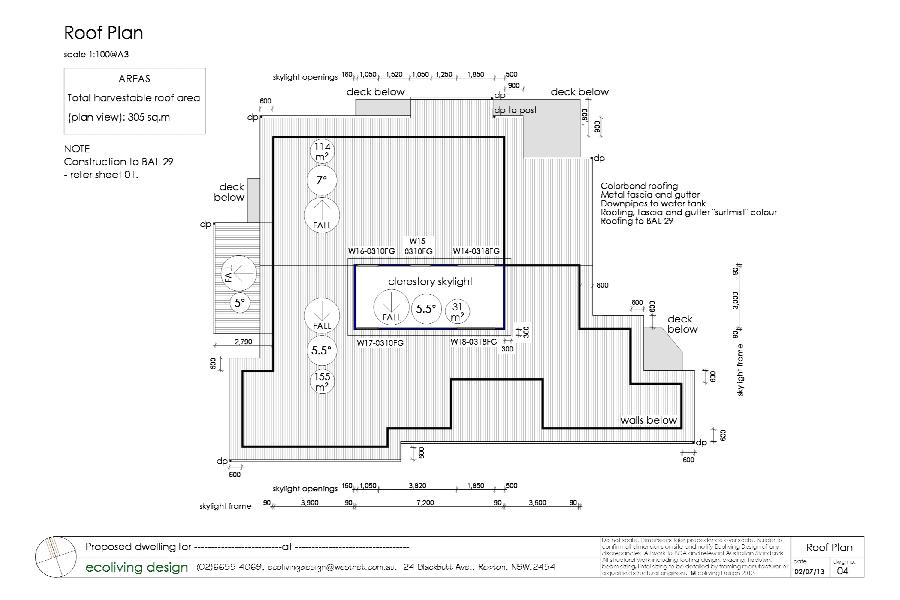
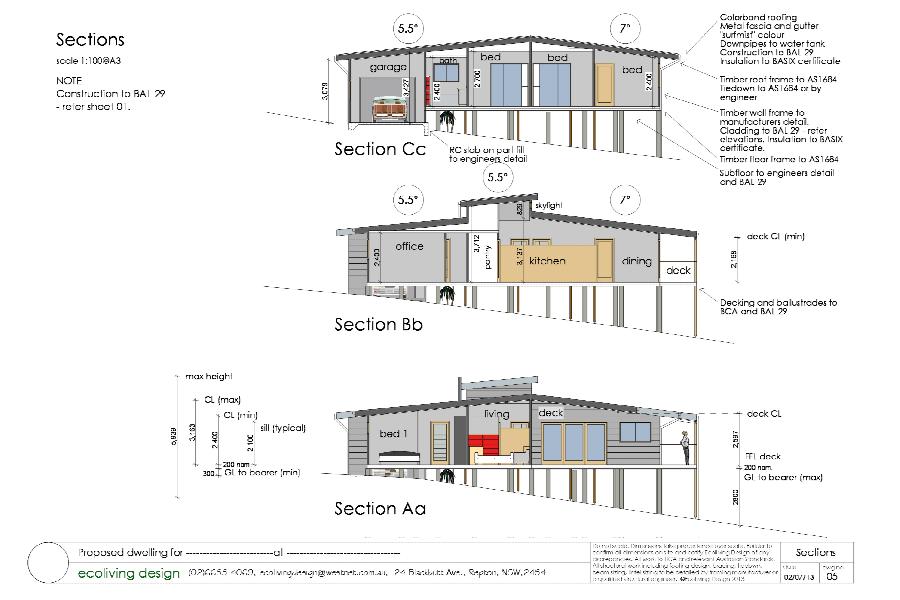
Once you’re happy with everything and the project is viable, final detail is added to make the drawings complete for council. Colour 3D perspectives are not required by council but are included to help with visualisation. The colour is used to indicate materials but we don’t aim for high accuracy photo realism because of the extra time and cost that would involve. As more detail emerges you may request minor adjustments but by now most questions should already be resolved.
The standard process of building approval is that council or a private certifier receive a Development Application (DA). This gives a general idea of what you want to build and how everyone is affected. The documentation will show where it goes, how big, what it looks like, a BASIX pass. Site issues that may need to addressed include on site sewer, bushfire risk issues, environmental impact etc.
If the DA is approved, you apply for a Construction Certificate (CC). The onus is now to prove the building will be built to a minimum standard. You may have to nominate a licensed builder or register as owner builder. Certification of the design by a structural engineer will be required. Manufacturers of some prefabricated construction such as roof trusses and wall frames provide structural certification with their product.
If we’re confident of a smooth passage through DA, we’ll go for a streamlined combined DA/CC. If there is the risk that issues arise with council during the DA that change the building, it’s better to go for DA only to avoid paying an engineer for work that becomes redundant.
Some work is Complying Development. If all the conditions are met, this is quickly approved because council does no subjective assessment.
We don’t usually formally supervise the building work but we like to keep in touch with how the building process goes. Once you’re settled in, we like feedback on how the house performs, photos and about our service – what you liked and how we can improve.
“I” and “we” is used interchangeably here. “I” refers to Nick, who is usually the most involved and typically has most of the contact with you. “We” includes Jenny. She collaborates on all the work and is a good listener.